I recently bought the Canon C300 markii and thought I'd share some of the footage and some first impressions here.
Although the markii has the same form factor as the original C300, it immediately feels a lot more solid. The camera itself is slightly larger and built from stronger material. The first big difference is the handle. This is so much sturdier than the original. Rather than having one small screw to fix the top handle, there is now a much more robust solution. The handle is fixed with two thick screws to a plate, which is then fixed with three further screws to the camera. On the whole this is great. It means you can now pick up the camra with confidence, no matter how big your lens or other accessories. The only downside to this is that it does take a while to remove the handle as there are now five allen key screws to remove. Still, a small price to pay.
The cables running from the LCD to the camera can now be fully removed, which is a major improvement. Also, one cable is for audio and the other video. This is another big advantage for gimbal users, as you can now mount the LCD monitor with just one cable fairly efficiently.
The big change with mark ii really comes when you start looking at the images coming out of the camera. I already liked the image I was getting from the C300 but the markii really impressed me.
The dynamic range is something that immediately jumps out at you. One of the first things I shot with this camera was inside a dimily lit cafe and the sun was absolutely blasting through the windows. The camera handled it so well. I used Log2 Cine gamut, which gives a slightly flatter image than the orignial Canon Log. I know pretty much nothing about colour grading, so I simply slapped the appropriate LUT on. I thought the LUT was a bit intense and made everything a touch to contrasty. I then backed off with the LUT to 50 percent and left it at that. There is a lot more that can be done to grade the image, but I just wanted to put this up as is, so you can see what comes out of the camera. The shots using Clog 2 are at the begining part of the video above.
The shot below is a jpeg screen grab from an ungraded shot, using BT2020.
The next thing, which I just couldn't believe was the low light ability. I was tentaively going higher and higher with the ISO expecting to see grain and digital noise and it just didn't happen. I was shooting with the camera on a Ronin, so I didn't want to shoot with the lens wide open. In order to have half a chance of getting anything in focus, I decided to stop down and use the ISO. To further complicate things I was shooting half speed at 50p and 120 shutter (we were in the USA, hence 120 rather than 100).
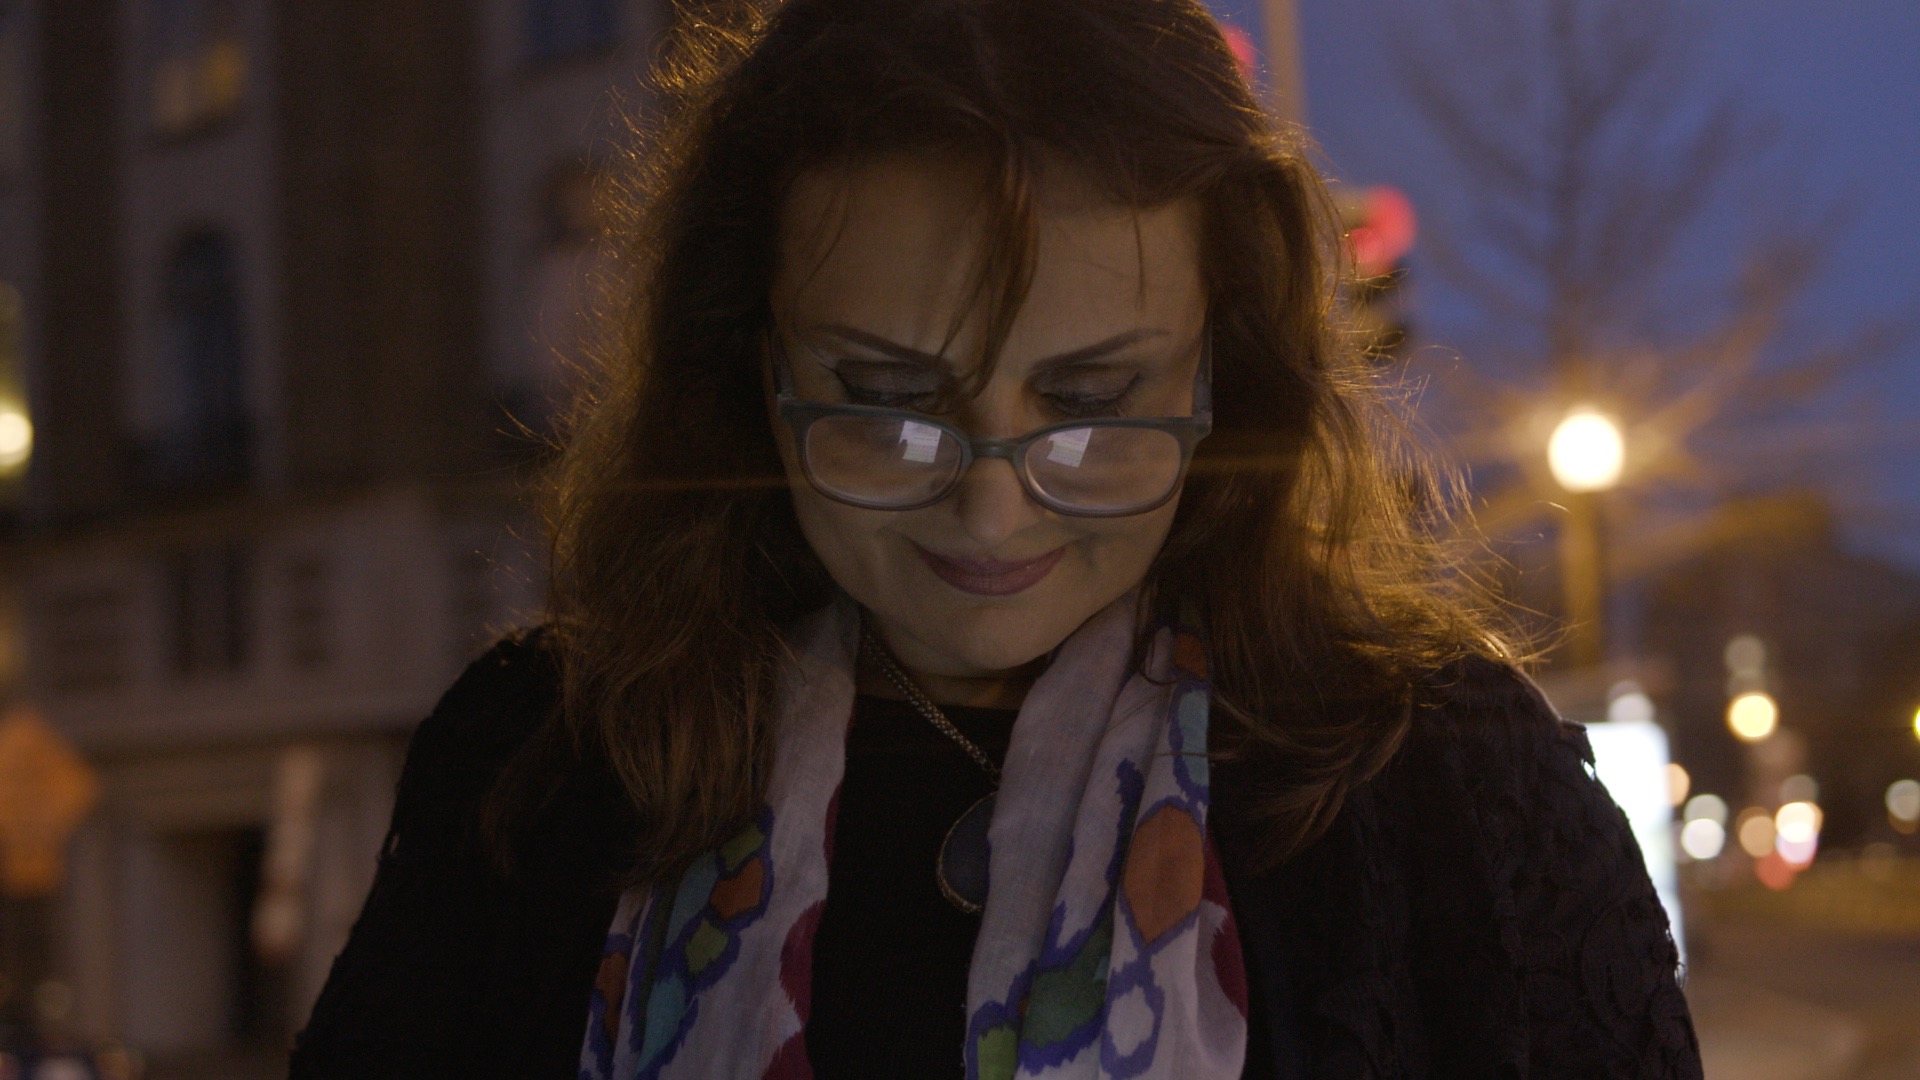
The shot above was taken at night a couple of hours after sun set. The only light illuminating the face here is from an iphone.
The lens flares are deliberate. I was using my Leica 35mm lens which flares like crazy if you don't use the hood or matte box. I personally love it, so use it as an effect.
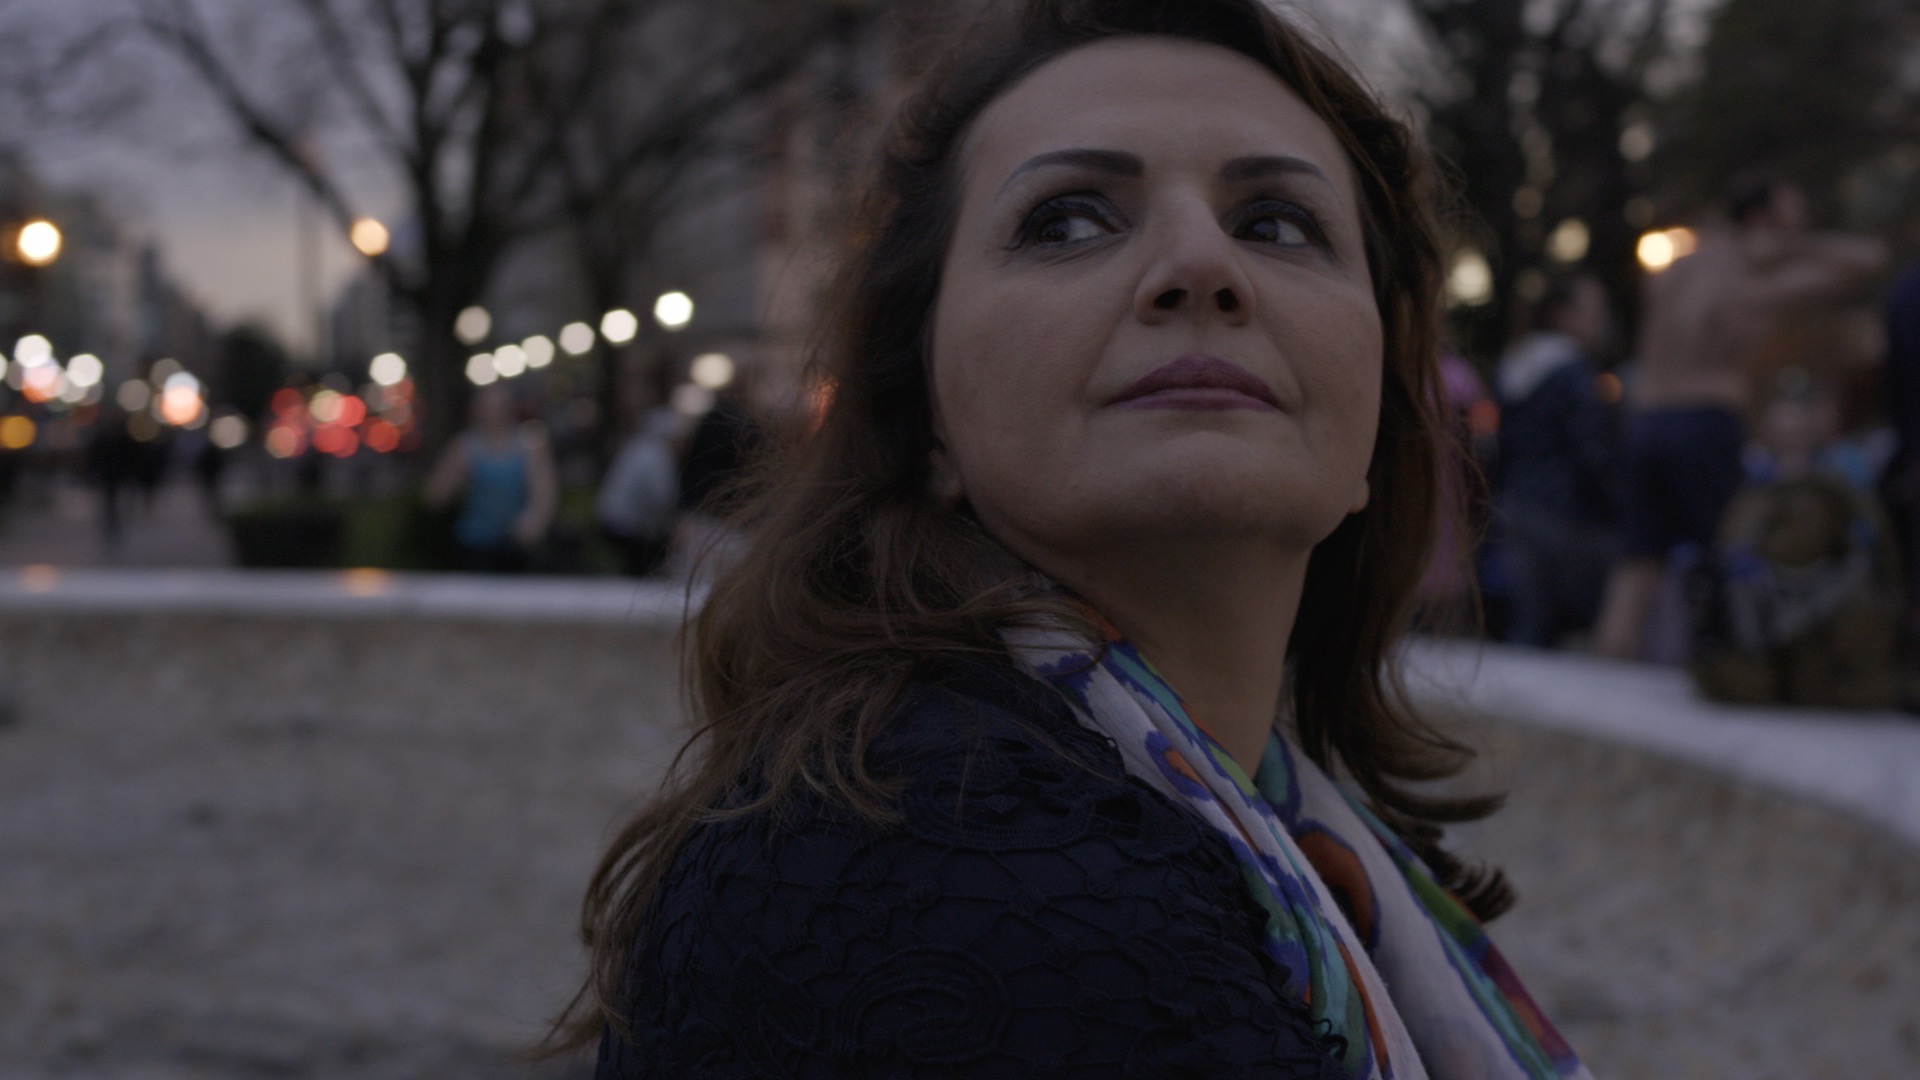
The shot above was taken just after sunset. Again there is no lighting here. Despite the lack of light, I really like the natural look of the image, it could certainly benefit from a grade, but I am pleased with this as a starting point. This is an image straight out of the camera with no LUT applied. For all the night time shots I didn't use LOG but shot with the BT2020 profile. This gives a decent amount of dynamic range and requires less work in post.
One of the feature I was keen to try out was the face tracking and focus. Since all of these shots were taken on the Ronin, I wanted to see if auto focus or assisted focus was possible. I found that, to my surprise, the face tracking and focus worked pretty well, with a few caveats.
The face tracking does work and the focus is smooth enough to use. However, it really functions best in decent light conditions. In daylight, or if you are lighting your subject well, the face tracking quickly picks out a person and tracks them. However, in these dark street scenes, where the director did not want any lighting, the face tracking struggles to see the face.
Another issue is that the auto focus does not work at all in slow mo. I found the best way round this was to shoot in 50p and then conform this to 25p in the edit, which gives you your half speed, but keeps the audio and the auto focus features.
A funtion that I really like was focus assist. If you are using a Canon lens, the camera is able to tell you whether to pull fowards or back to acheive focus. This was amazingly useful, particualarly when the camera was on the ronin. Even if you are using peaking, it's really tough to see what is in focus when you are running around with the ronin, but the focus assist really made it easy.
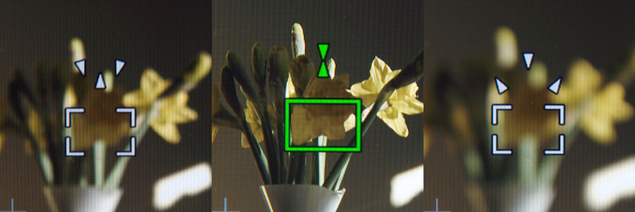
Often I would set the focus at a distance I wanted to be from the subject, and then turned on focus markers. Depending on whether the two triangles are above or or below the single triangle, lets you know which way to pull (or move). On the left shot the focus is set towards infinity and the focus is behind the flowers. In the shot on the right the focus is set too close and the focus is infront of the flowers.
This was particualarly helpful on the Ronin, and I would just move the rig closer to or further away from the subject.
It is also very useful in an interview situation if you are shooting at a wide aperture and your subject is moving backwards and forwards a bit. It is nice to have control of the focus yourself so you can decide if you want to pull focus or not.
The only thing I didn't like about the focus was that the digital zoom in now doesn't work once the camera is in record mode. This seems like a step backwards to me. This will apparently be fixed in the next firmware update. For now, I just need to learn to trust the focus guide - so far they have been amazingly accurate.