Jibs come in a range of sizes from massive beasts that swing over thousands of heads at a concert to four foot mini jibs that one person can walk around with. There are people that own Jimmy jibs with hot-heads and use them everyday at work, and can pull off amazing shots with them, however, this article is aimed at people using the kind of jib that is small enough to check in on a plane or put in the back of a car. NB Some people refer to jibs as "cranes" to my mind, a crane is something on a building site, or maybe a massive techno crane if you are on a big budget movie set, so for the purpose of this article we are talking about jibs.
Typically, I'll only occasionally need to do a jib shot on a shoot, however, this summer I spent 6 weeks where I used a jib most days, so thought I'd write up a few tips on getting decent shots.
1) Recce your spot. Jibs are massively time consuming compared to tripod shots, so choose your location carefully, you don't want to waste time setting up a shot only to decide it doesn't really work. If you are unsure, take your camera over to the spot and just try out the move you want, so you at least get an idea of how it might work.
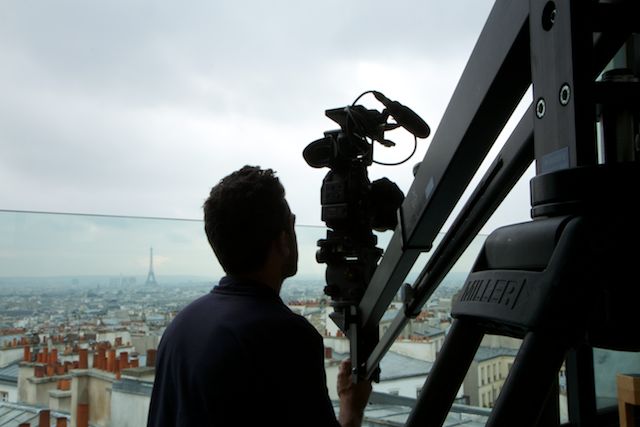
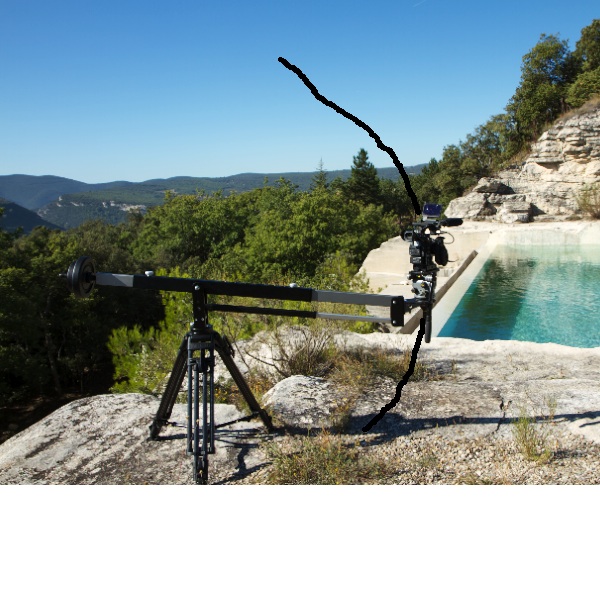
2) Set up your jib correctly. You'll be looking at 2 bubbles here, one on top of the tripod and one on the end of the jib arm at the head. Make sure the bubble on the head is still in the centre wherever you swing the jib arm, if your tripod bubble is off, the head bubble will change as the jib arm moves. The next thing to check here is that everything is secured. Since the camera is on the end of a long arm, any movement will be magnified, if the weights aren't tight and wobble slightly the camera will wobble a lot. Next, the obvious bit, make sure the jib is perfectly balanced, the weight arm needs to be pulled out so it balances with the camera. Once I have balanced a jib perfectly I tend to mark it with tape or a white pencil, so I know exactly where the balance point is, that way, next time I set the jib up I can go straight to that marked point. Remember different lenses, batteries and other attachments are going to change the balance point, so it is a good idea to keep the same kit on the camera if you want to set up quickly.
3) Work with 2 people. There is a lot to concertrate on with a jib shot, you might be looking down at a monitor and not at the actual camera. Having another person there will insure you don't swing the jib into that priceless chandelier or the clients head.
4) Start simply. The shot you saw in that film that started in a room, went out the window and decended to ground level was done with a remotely operated hot head. Chances are, if you are on a documentary shoot you won't have this. If you haven't used jibs a lot, start by just locking of the head, no pans, not tilts and just use the jib arm to move up and down.
5) Try more complex moves. Still keeping the head locked off, it is good to try swinging the jib arm whilst raising or lowering the boom at the same time. This takes a little bit of practice, as it doesn't look good if one movement finishes before the other, i.e. if the camera has finished rising or lowering, but is still swinging left or right. To get this right you need to make a diagonal movement and mark out a start and end point in your head. For this kind of shot I find it works better if one person just looks at the monitor and the other concertrate purely on the swing, so he or she can concerntrate on that start and end position.
6) Try even more complex moves. Moving the head, tilting or paning, whilst simultaniously operating the jib arm is really tricky to get right, but can be worth while. The jib will float around fairly effortlessly as it is balanced, whereas tripod heads tend to use lots of friction. I find the best thing to do is to slacken the tension right down on the head, so if feels similar to the resistance from swinging the weight of the jib arm. It is worth practicing the move a few times to make sure you can nail it. This works particularly well if the shot is going to be ramped in post (as the speed will gloss over any mistakes in the middle of the move)
7) Shoot wide. Anything other than a fairly wide shot will wobble. Also, wider jib shots tend to look more dramatic.
8) Find some foreground. If you jib up 10 ft with nothing in the foreground the move will be almost imperceptible, however, if a tree of a plant or a textured wall or whatever is just in front of the camera the move will appear huge.
9) Reveal things. Starting with your shot totally obscured by an interesting object, or even just a wall or a plant, will make your shot more dramatic.
10) Solar flares. Playing around with solar flare will often get interesting results with a jib as the flare will change as the shot moves. I often like to move towards or away from solar flare, that way the shot can start or end of total sunlight, which makes a good cutting point for the editor.
11) Use a bit of height. With the tripod fully extended, and then the jib arm at full height on top of that, you can get some real height on a jib. Sometimes this can be interesting in itself and you may not need to move at all.
12) Pace. Moving the jib slowly from start to finish is going to be easier in terms of giving you a stable start and end shop without any abrupt wobbles, however, a slow shot isn't always what the editor wants. In many cases they can just ramp the shot in post, however, this won't always work, for example if you have a flowing river, or people walking in shot then you need to get the pace right. You'll probably have a fairly good idea about whether the show your working on use fast or slow moves, but I typically offer the editor several different speed variations if I know it is a shot that cannot be ramped.
13) Trajectory. This is a tricky one to explain. If the tripod is at 90 degrees to where the camera is pointing, and you jib up, the movement is going to have a curve to it, if the tripod is directly behind where the camera is pointing the movement will be straight up and down. This is something you can use to your advantage, for example you can track up the side of a tree and towards the end of the move the camera will move away from the tree to reveal a clean shot.
14) Monitor and check the take. Sometimes I use a monitor when I shoot with the jib and sometimes I don't, it really depends on how difficult the shot is, however, I always check the move back after each jib shot. It takes so much time and effort to lug a heavy jib about, spending a few seconds to re check the move is definitely worth it. You are concentrating on lots of different things with a jib, so it is easy to miss something in the monitor (like at the end of the move you just caught your own reflection, or that bit of kit on the floor in the distance).
15) 2 for 1. Since jib shots take a while to set up, I usually have a look around and see if I can get a 2nd or 3rd shot from the same position, it isn't always possible, but it is a good idea if you are short on time.
Finally, here is a property show I worked on. As you can see they love to use moving shots, anything where I used a jib, track tended to make it into the programme.
{vimeo}120459697{/vimeo}